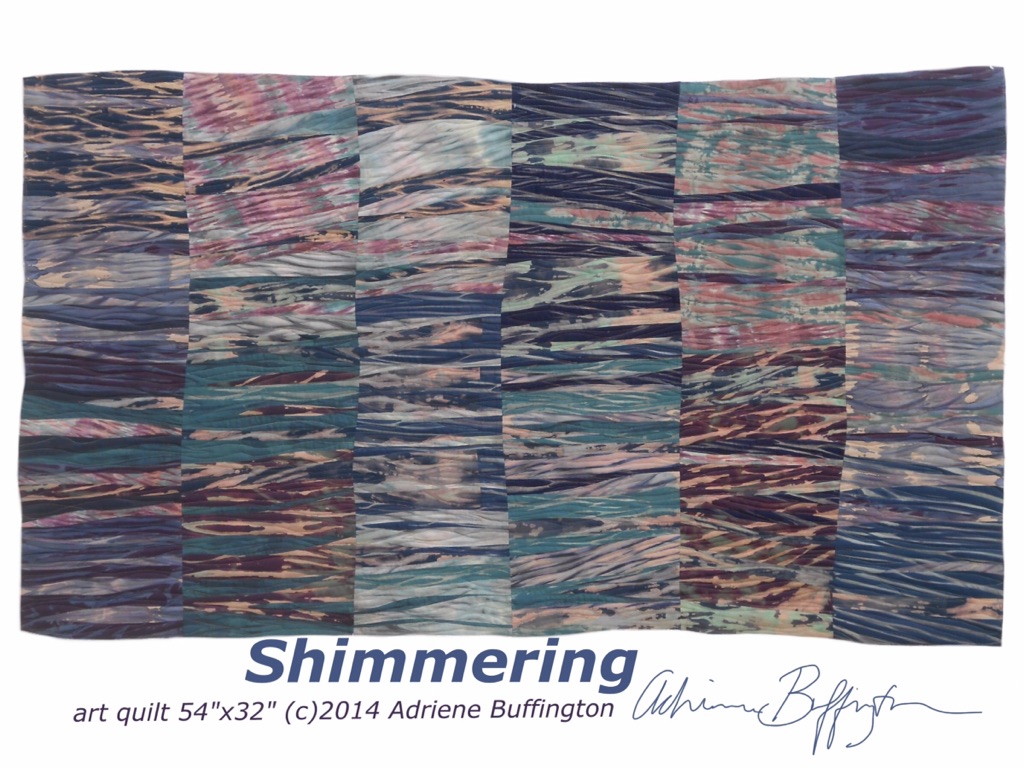
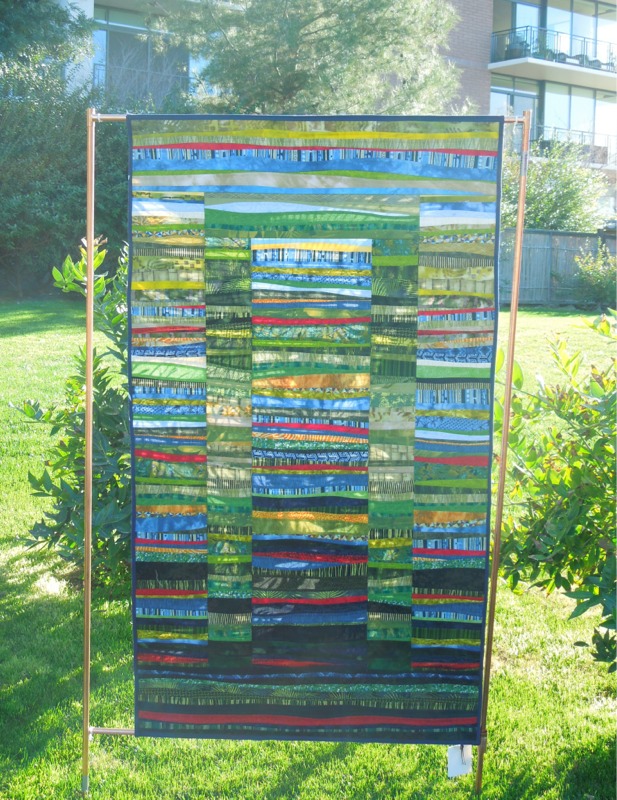
springtime flowers reflected in clear water
creating the fabrics


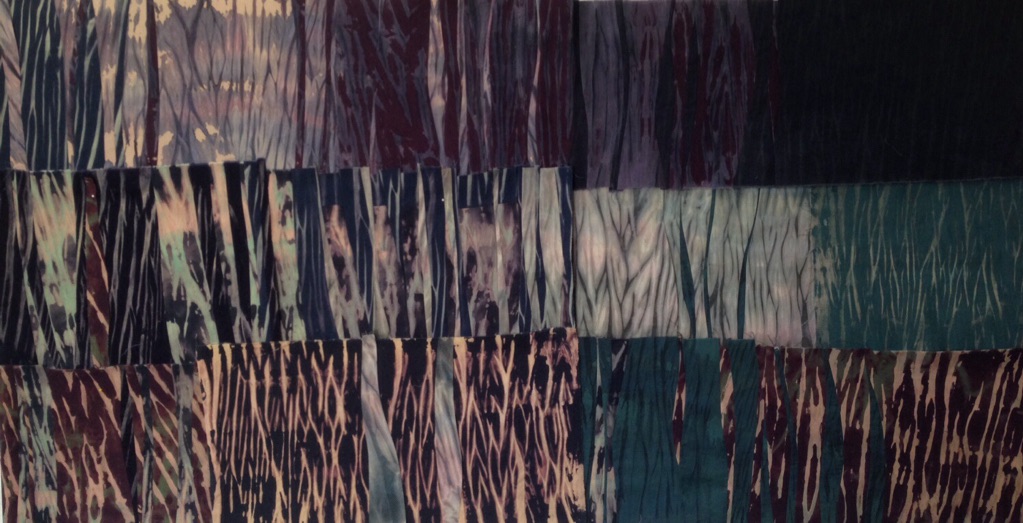
All of the fabric in this Art Quilt is discharged, dyed and/or painted by me.
I used a technique known as “arashi shibori” – wrapping fabric on a 4” diameter piece of PVC pipe, winding that with cotton crochet string, and scrunching it tightly. Some dark solid colors were discharged with bleach, some with thiox. I added vat dye to the thiox paste on some- to add and subtract color at the same time. Other fabrics were bleached and rinsed, then I used liquid acrylic paint to add color. And although I am fascinated by the wrinkled texture, I ironed out all the scrunching.
designing and sewing

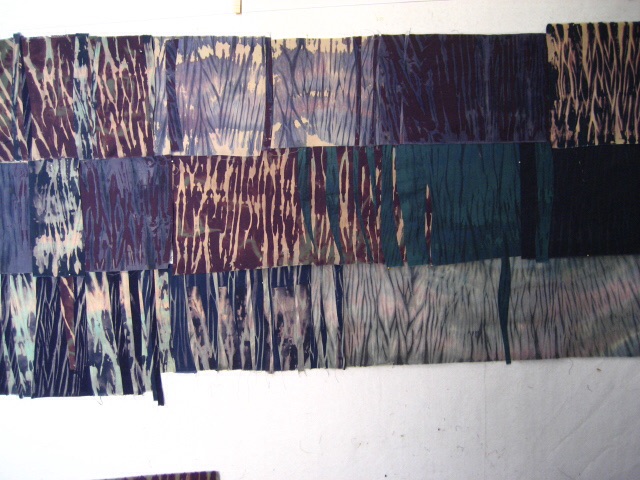
Most of the dyed fabric pieces were 10”-12” wide, and I knew I wanted to use them in large rectangles. I began by arranging them in large sections on my design wall. Then I sliced skinny strips and inserted them into contrasting fabric sections. I wanted repetition and rhythm, but not regularity.
adjusting and finishing
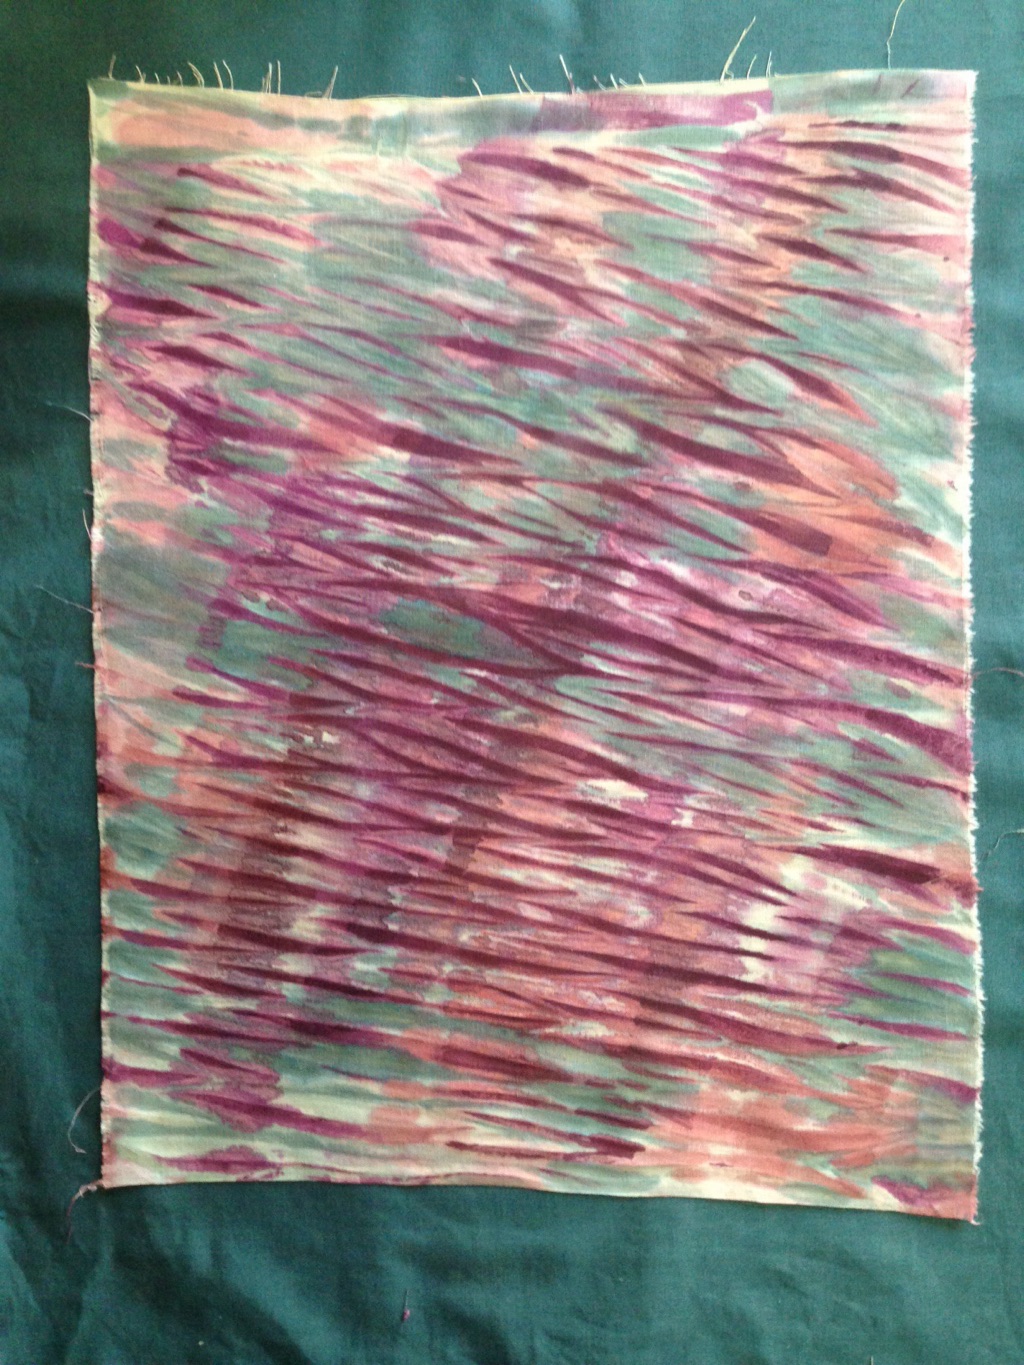
The original set of fabrics were mostly dark and muted colors. I wanted more pastels, more pink and lavender- so I created more fabrics and added them to the mix.
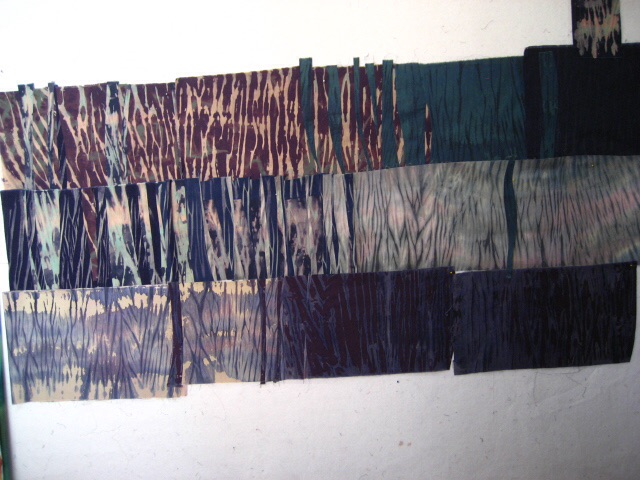
I arranged and re-arranged the pieces and sections until I had something that pleased me.
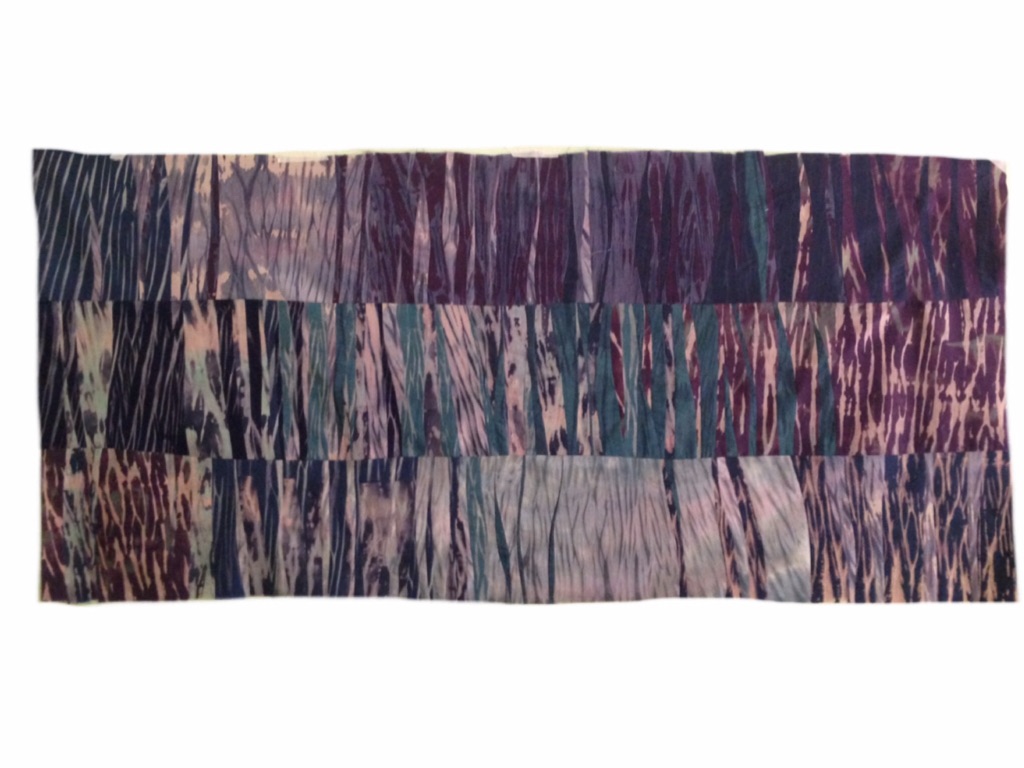 And then I changed my mind completely- the lines needed to flow horizontally instead of vertically. Much un-sewing and rearranging! But this felt much better to me. And then I changed my mind completely- the lines needed to flow horizontally instead of vertically. Much un-sewing and rearranging! But this felt much better to me.
 quilting quilting
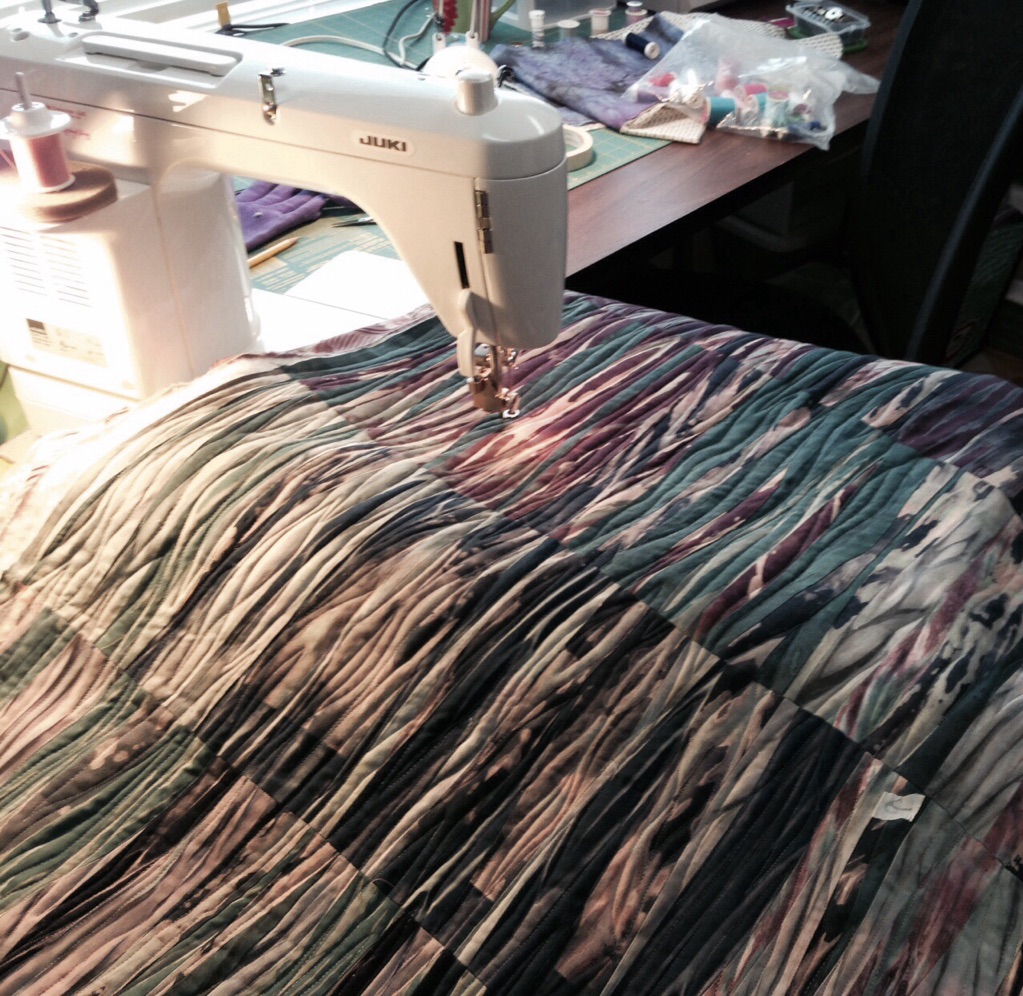
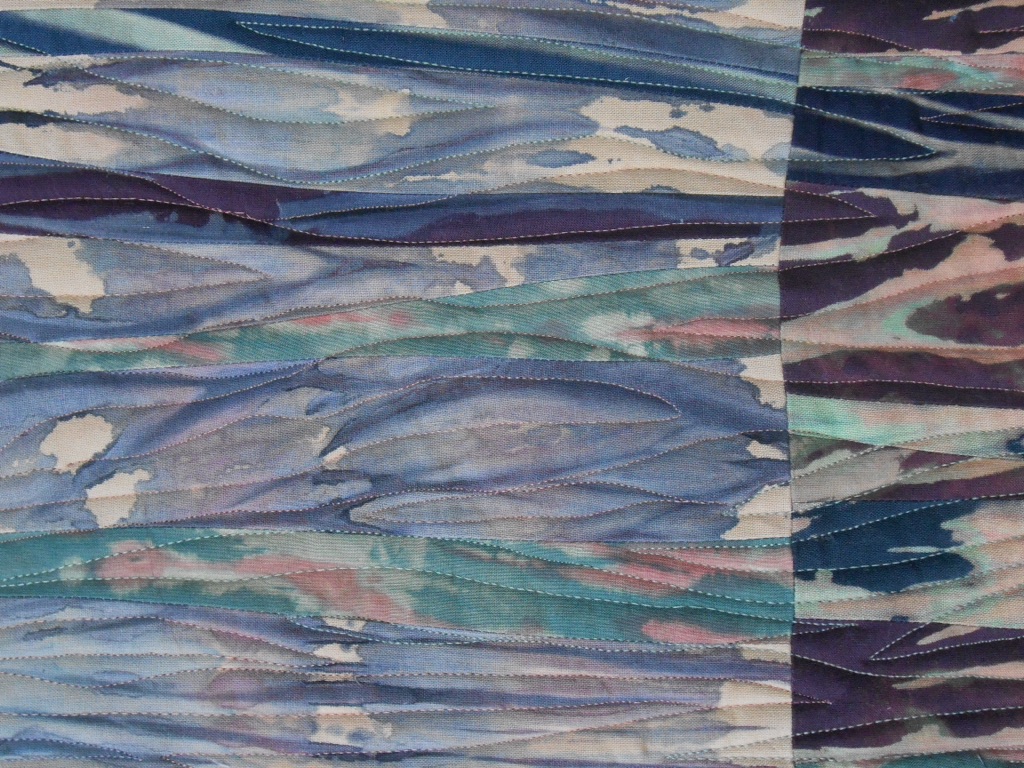
I used several colors of thread to free-motion quilt more rippling lines across the surface of the quilt.
I gave this quilt to my mother and step-dad for Christmas, because it looks just perfect in their living room!
Posted by Adriene Buffington
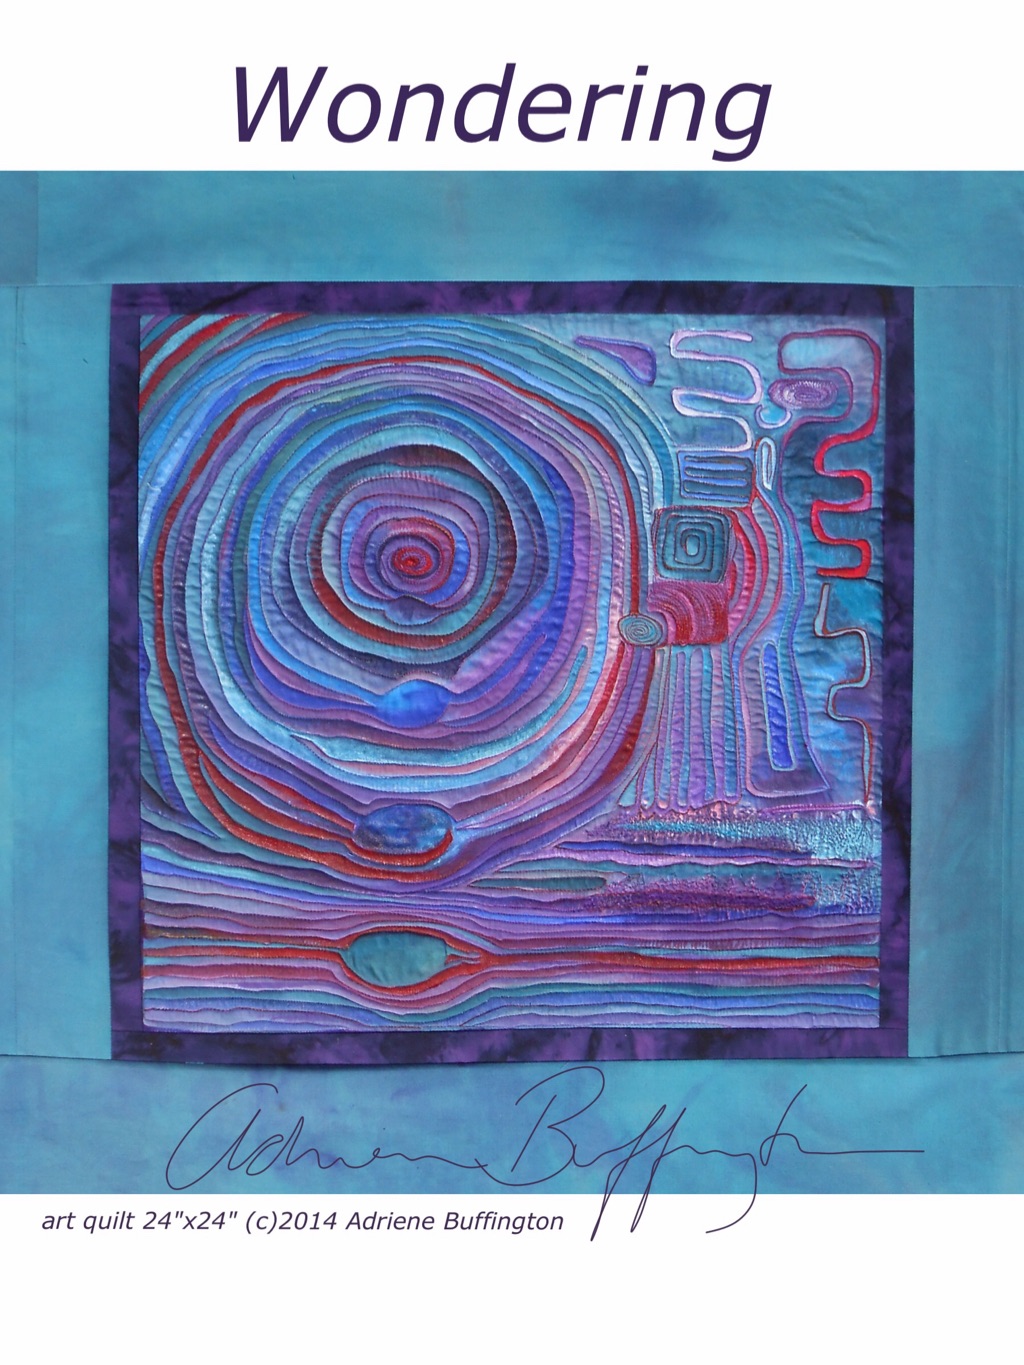
This was my first breakthrough piece of 2014:
 (C)2014
24″ x 24″
$1500
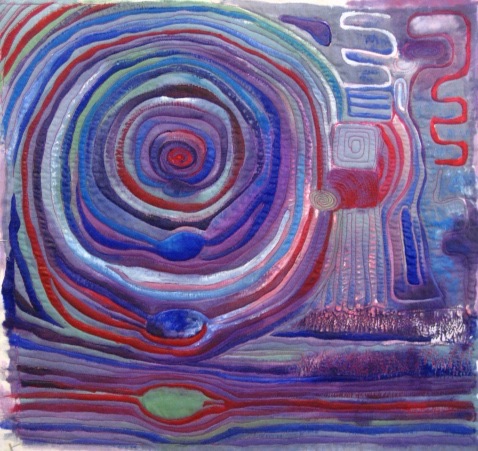
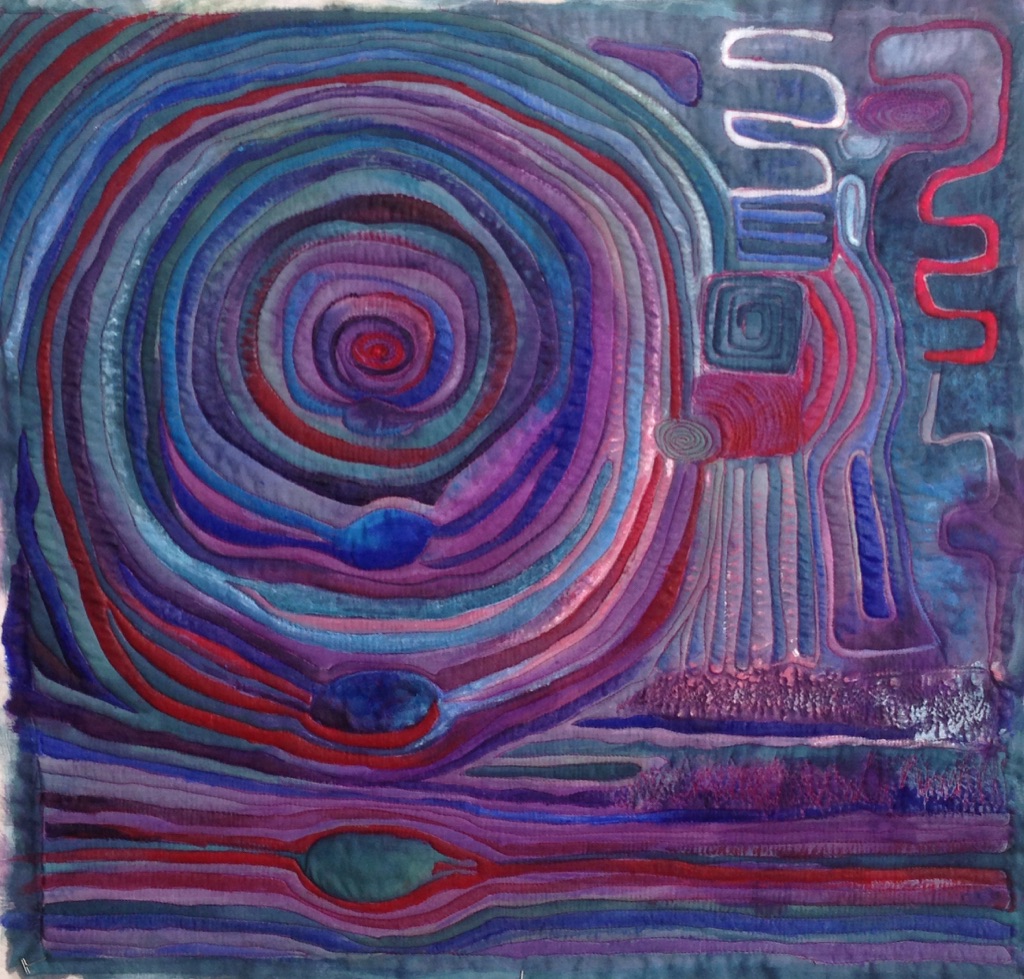
This is like the path on which my mind travels. I go through phases of clear linear thinking, scrambled confusion, spiraling ideas and centering prayer. I am continually asking myself ‘what if…?’
I have been wanting to combine my art quilting and my painting, but it took me a long time before I was brave enough to experiment, willing to risk failure in the hopes of discovering a new way of working.
This design is partially inspired by the spiral paintings of Hundertwasser.
This was exhibited at Art Quilts XIX at the Chandler Center for the Arts from October through January.
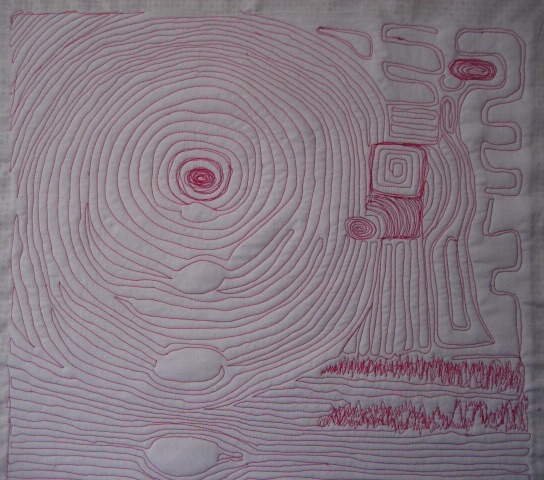
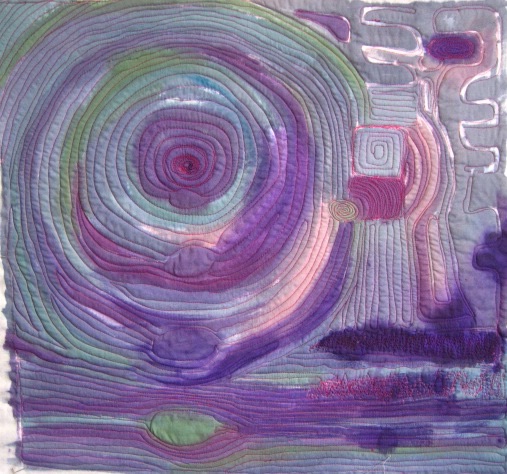
process and materials
Free-motion machine quilting: pink cotton thread on white cotton fabric, cotton batting.
Paint: fluid and high flow acrylic paint, permanent marker.
Border is hand-dyed fabric. Mounted over stretched canvas.
 by Adriene Buffington
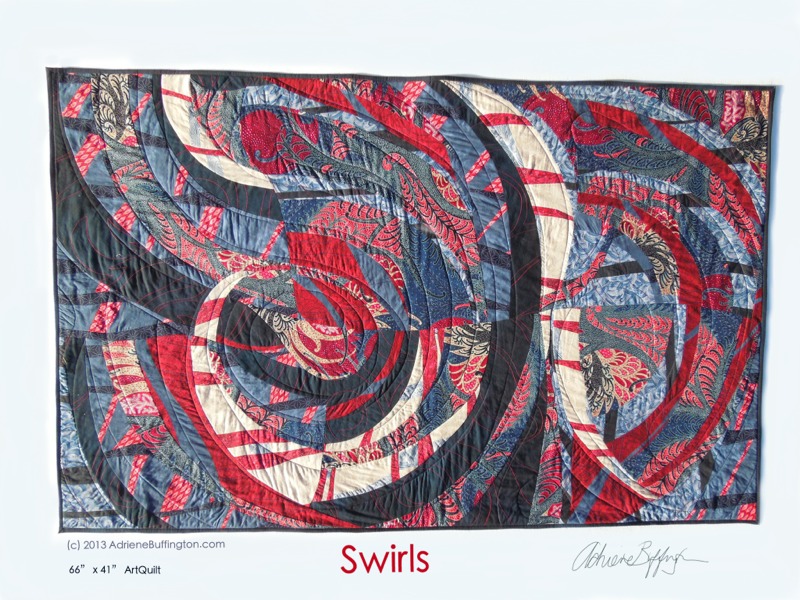
I wanted to share a few photos of “Swirls” as I was working on it. I thought I’d write a bit about the process- like a tutorial perhaps.
But what’s on my mind at the moment is how frustrating this piece was to make. I might have give up any number of times, except that I had a commitment and a deadline. And yet, with all that frustration, I felt excited, engaged, challenged. The frustration was actually fun!
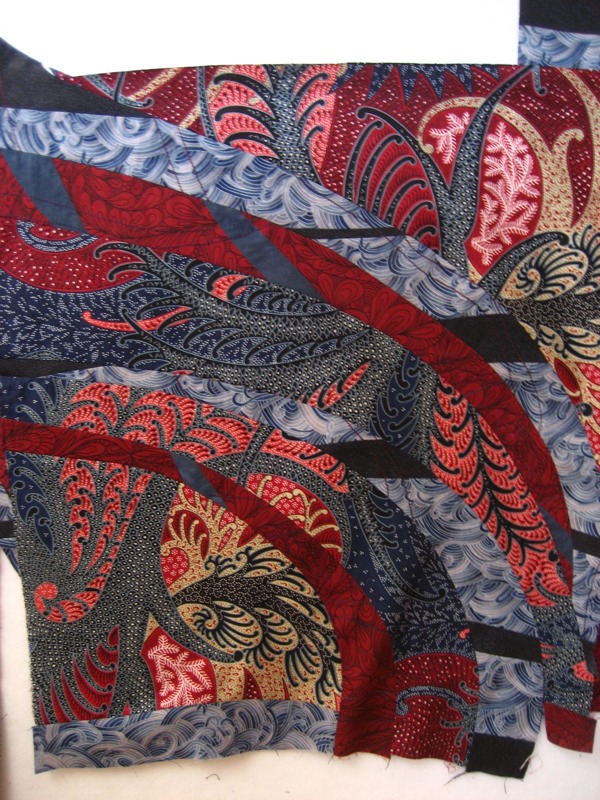
I started with a collection of commercial print fabric, maybe one hand dyed by me.
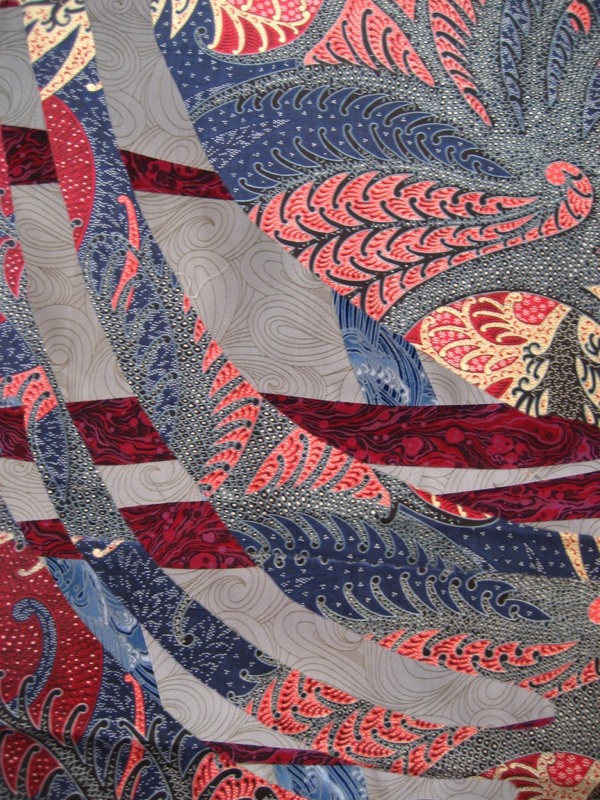
The ‘featured’ fabric is a large-scale paisley-ish print.
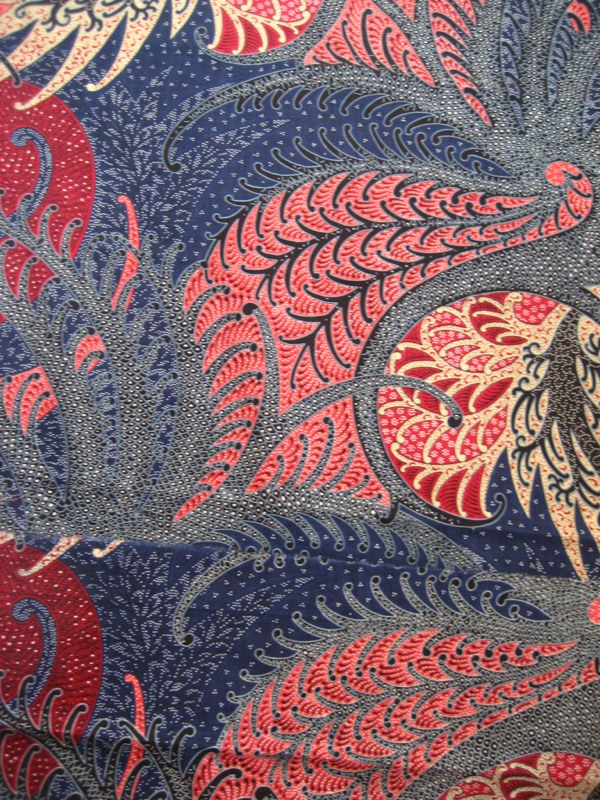
It is a great place to start- lots of movement, texture, value contrast, and interesting from both a distance and up close. But it is blue, red, and off white- definitely not a palette I love. And since color has such a strong effect on my emotions, it was actually my first frustration.
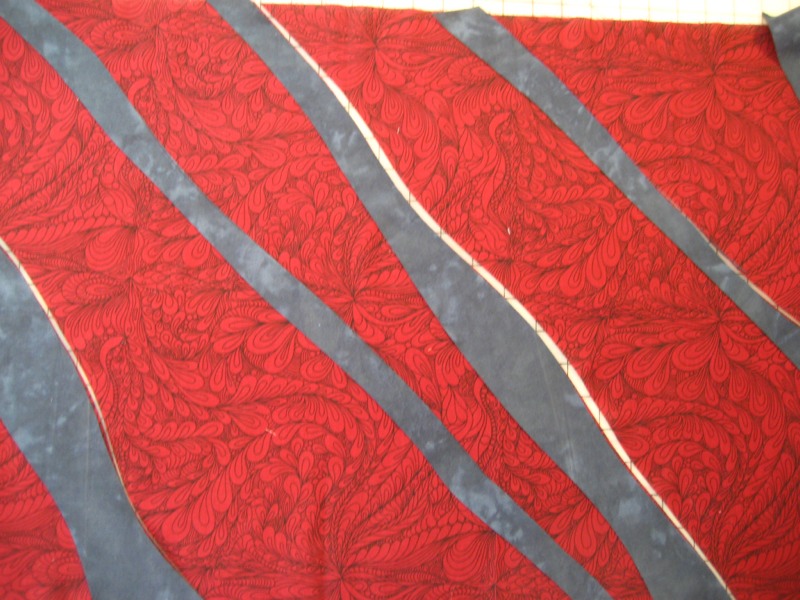
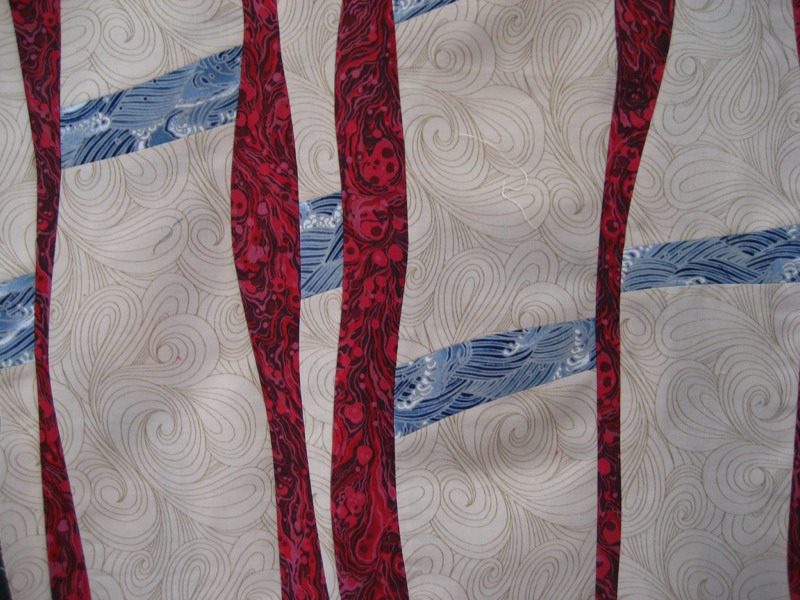
First step in this variation on my “Spontaneous Strips” process is to insert curvy strips into my ‘base’ fabrics. I made 4 different combinations, using fabrics that were swirly prints, in red, indigo blue, and cream. I machine-stitched wavy lines on some of the pieces.
And then I got stuck. Not frustrated here, but scared. I had a general idea of what I wanted to do with these stripped fabrics, and how to do it. But slicing into them is a big commitment, and although I am never entirely certain of how my ArtQuilts are supposed to end up as I am working on them, I wanted to try out a few options. So I took these photos of the pieces and loaded them onto my iPad.
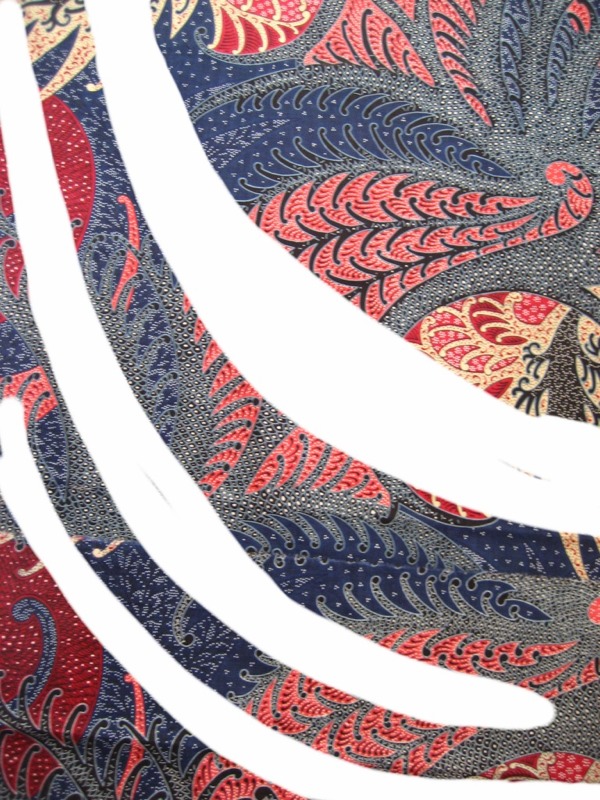
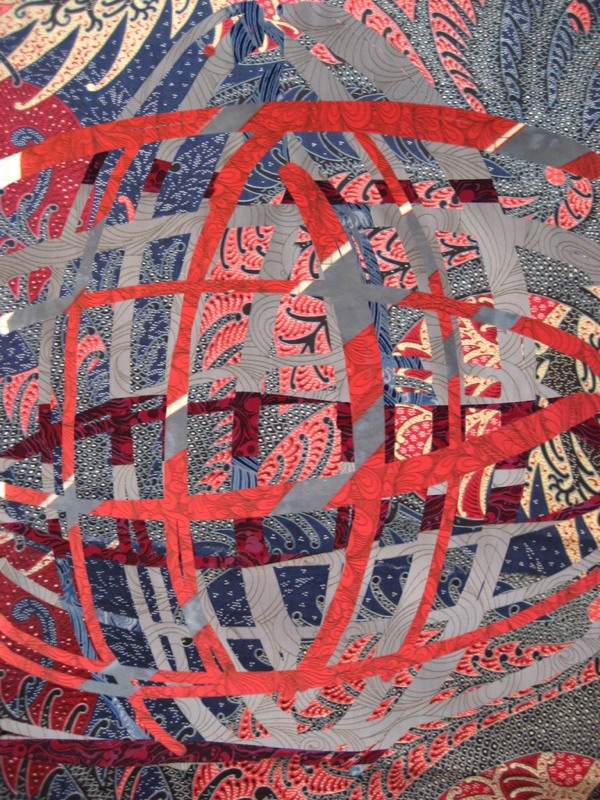
I used a simple painting app, Sketchbook Express, and imported a photo of a different fabric on each of 3 layers. Then I used the ERASER tool to “cut” out sections from the top layer, so the fabric below showed through.
I merged layers, duplicated and rotated, and played around until I had a couple of options. My initial idea was to have a central circle with ripple-like rings. But I liked the one with separate ‘blocks’.

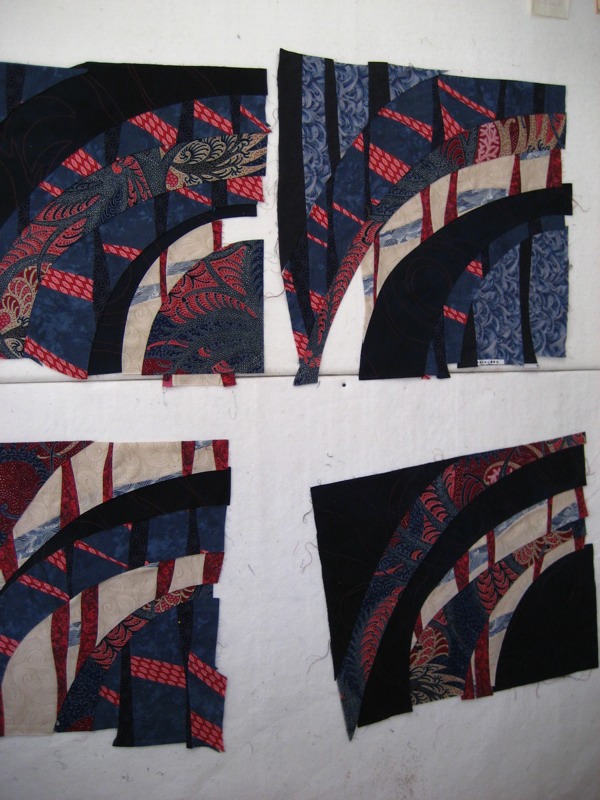
So I was ready to stack up 2 of my stripped fabrics and the big print, and slice them into nice arcs which would go back together into ‘blocks’. I could have made it a lot easier on myself if all of these had been the same size and shape- but since I started with odd pieces, I ended up with even odder shapes. Causing my next frustrating challenge: how to deal with the big pieces so I can slice them into smaller pieces that will fit back together. Instead of squaring them all up, which would have meant they were quite a bit smaller, I just used them as they were- which only postponed the frustration till the next step.
Assembling arc-shaped pieces into squarish blocks is a challenge- but I’m confident with sewing curves, so it was a fun sort of frustration. I added fabric to the edges of the too-small pieces, and made it work. At the end of this stage in the process, I had 3 interesting blocks to play with and I was liking how they worked together. Notice that I didn’t use my computer sketches as patterns, just to get a general idea for the direction I wanted to go.

I made 4 more ‘blocks’ with the paisley print, a solid navy with machine-stitching, and 2 more stripped fabrics. These had stronger value contrast than the first set, but those big sections of very dark and very light proved to be the next source of frustration. Since they were already sewn into blocks, I couldn’t shift just one piece of fabric. Which meant lots of re-arranging (and once or twice cutting and sewing again.)
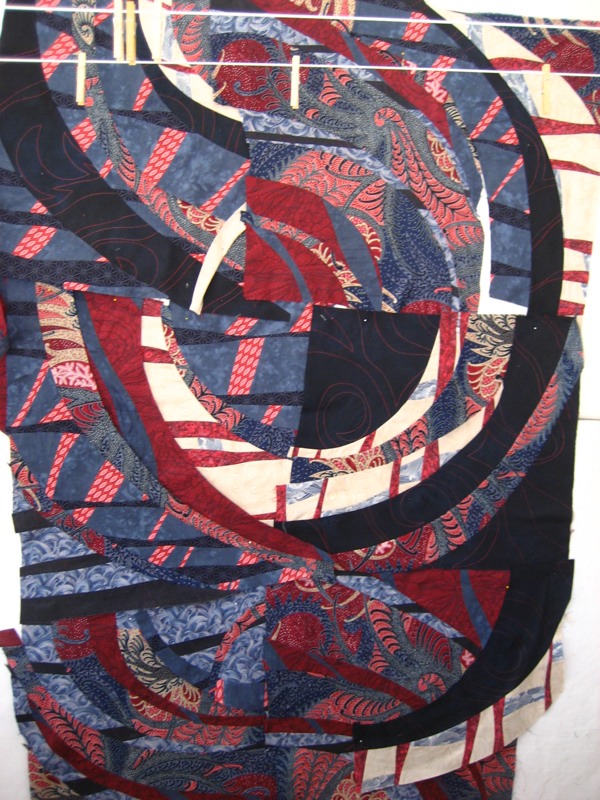
I finally had the blocks arranged in a way I liked- sort of a combination of the central circle and the separate swirly blocks. But the center was all wrong- the big dark quarter circle is a hole your eye falls into. Frustration! Fun! I needed something that would add to the flowing swirly feeling, and keep your eye moving. Back to the initial busy paisley fabric, I cut a section of the print that echoed the larger swirls, and integrated that into the center. I also continued and finished off the swirl made by the lightest fabric.

The final frustration was the bottom section. I re-arranged and tried everything to make those bottom two blocks work. I had always envisioned this piece as a tall rectangle. But the swirls didn’t want to go down, they wanted to flow sideways- changing to a landscape format. Which made perfect sense, as this piece was inspired by a landscape, and made to be displayed in a garden!
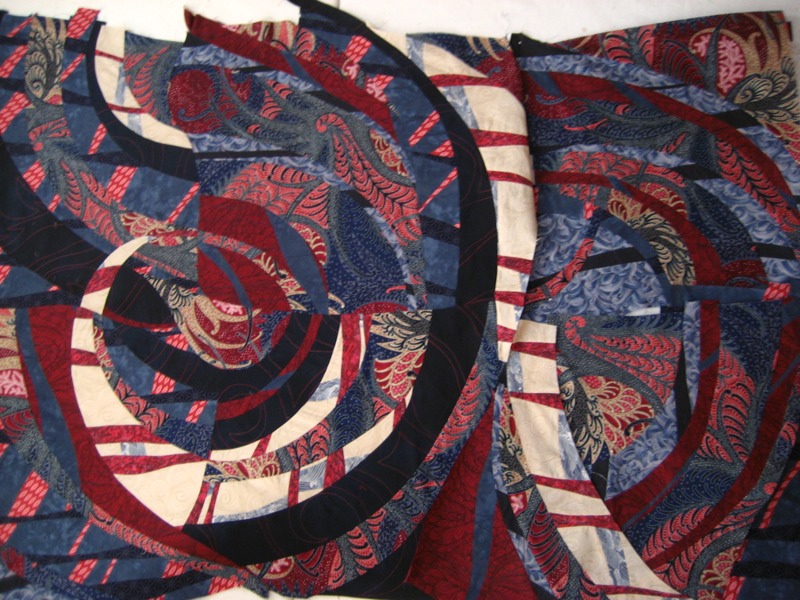
The last challenge was finishing the piece as a quilt. I haven’t quilted and bound a piece this big in years! But I had the perfect backing fabric, and I knew I could machine-quilt big swirly lines. The only frustration here was re-arranging my studio so my tables could support the quilt as I worked. Oh, and the binding. Binding is my least-favorite part of the whole process. I decided to only have the navy strip showing on the 2 sides- the top and bottom were finished with a facing strip of the backing fabric. I machine-stitched the whole binding, the facings and the hanging sleeve, but had to go back and hand-sew some places on the back.

Well, there were actually 2 more frustrating challenges: making a good photo, and hanging it. But those were after it was finished!
Posted by Adriene Buffington
During the month of March, I had the opportunity to share my ArtQuilts in a unique venue- the Japanese Friendship Garden in downtown Phoenix.
Here are my 2 newest pieces, on display in this lovely outdoor setting, with haiku poems to go along with the theme: Fiber Haiku
Meditation
Meditation is
A doorway to inner peace.
Sit still. Breathe deeply.
36″ x 64″ $1900
Swirls
Wind ripples water.
Breeze rustles leaves. Branches sway.
But stones remain unmoved.
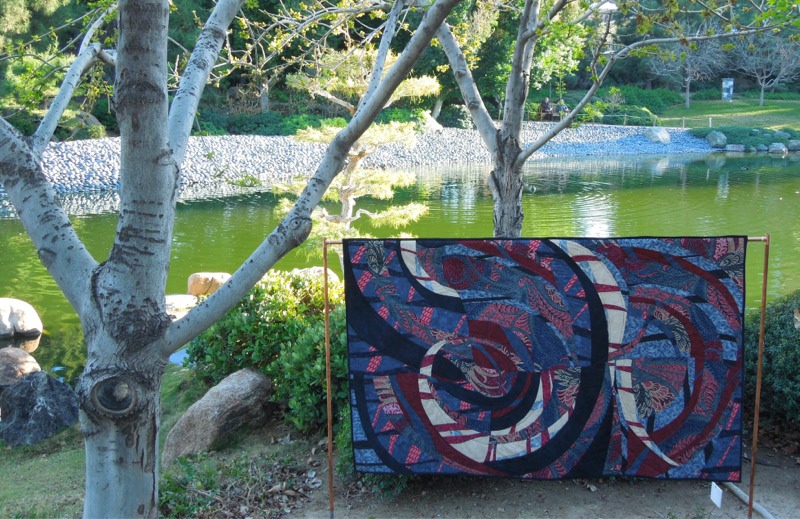
66″ x 41″ $2500
Location: Phoenix
I am learning to live in the present moment. 2012 A Buffington")
This does not come naturally to me – I tend to live more in the land of possibilities. I like to think of myself as a visionary, imagining all kinds of wonderful potential outcomes – not perfect, but truly excellent. I have visions for what could a church be, what my friendships or my body or my house could be like if dreams came true. Only they never do – not exactly like I hoped, not everything they could have been.
So, instead of being hopeful , what I usually felt was disappointed. What actually happened always paled in comparison to the potential of what I envisioned. I have been learning to accept what IS, to be grateful for how things really are – not how I think they should be. To love the reality of a person or thing or situation, to rejoice and be fully present in the now.
This piece is called “Now and Not Yet” . It was started as a potential commission. I needed it to be done by a deadline, so I could get it into a gallery in Scottsdale. I was also exploring the theme of an art quilt show for which I am the juror: Integrating a Paradox Art Quilts XVII
What I had in mind was an abstract representation of the Kingdom of God. Not to get too theological, but as I understand it, Jesus’ life, death and resurrection was the embodied presence of God’s perfect love and grace breaking in to our world. Heaven came to earth, and it will come again. But it isn’t completely here yet. There are still all sorts of things that aren’t how they should be– things that disappoint and hurt and even make us angry.
And yet, the resurrection of Jesus Christ is the promise that the coming Kingdom of Heaven will be glorious, and everything will finally be completely how it should be. Justice, beauty, love, life. We get little glimpses and foretastes, and sometimes overwhelmingly beautiful experiences of that future here and now. Heaven is already here, now. But also not yet. We need to learn to notice and be grateful for what IS NOW, and with hope and faith, be moving towards what is NOT YET.
 2012 Buffington") Now and Not Yet - as completed the first time In my Art Quilt, the red and green fabrics represent the present and the future, earth and heaven, now and not yet. They overlap and intersect and there are open doorways between God’s kingdom and our world, between present and future, between gratitude and hope. There is some energy and tension, some order and some chaos. I even put little smidgens of yellow at the edge – thinking I will make a companion piece that is more yellows and greens and blues too!
Anyway, I finished this piece in March. And it was okay. Better than okay, but not everything I hoped for. Honestly, I was a little disappointed and not confident it would work for the client – and just not happy with the left side. . .too much red with not enough variety of size, value, color. I really loved parts of it, most of it really.
I decided to use images of my ArtQuilts on a set of affirmation cards – the one with “Now and Not Yet” said: I am fully alive in the present, and hopeful of goodness yet to come. Another affirmation card said: I am not afraid to make bold changes when things aren’t working.
 2012 A Buffingotn")
After a week or two, I made a bold decision about “Now and Not Yet” – I needed to re-do the parts that I didn’t like. I have no problem ripping seams and changing things around while I am working – that’s a normal and fun part of my process. I like it! But I NEVER re-do something once it is completely finished.
But I did on this one, it was worth the extra effort. I removed staples, un-stuck fused backing, ripped out a section. What I actually changed was relatively minor, but it made a significant difference. (One side of the green doorway in the red section.) Also, I sliced off 4 inches of the boring left side!
2012 copy")
I acted on my affirmations – fearlessly making a bold change. I liked it and it was worth it, and I could clearly envision a better way for this piece to be than it was. I moved from disappointment to confidently hopeful action. I am enacting in my art making what I am learning in my life, and vice versa. In the process of re-doing this piece, I became more bold, less fearful, more willing to act in the now and more confident about the not yet. This piece was destroyed and re-made, killed and resurrected. Now it is what it wasn’t in the past – and I have started working on the next piece, the Not Yet.
 2012 A Buffington") part 1 finished My mother taught me to sew; she taught me a lot of good things. But finishing major projects and maintaining creative momentum were not necessarily her strengths. Which is why I have had to unlearn one of her favorite lessons. . . about coming to a good stopping point.
A good stopping point is the end of a major step in the process. When all the current problems are resolved and there’s nothing left to do in this phase of the project. Like after you have all the quilt blocks assembled and before you sew them together. Or after you have the outline completed and before you write the first paragraph. Or when all the fruit and flowers are painted and you just have to paint the background and shadows.
You know what a good stopping point is for whatever it is you create.
. . . and it is actually a terrible place to stop.
A good stopping point is dangerous, because it is an easy place to quit working altogether. When all the problems are resolved and all the seams are sewn, or all the interesting parts are done, it is really, really hard to get back to work. Getting back to work after a good stopping point is like facing the blank page all over again. You have to figure something out before you get going, or you have to do a difficult or maybe a dull task to get back into motion. It is hard enough to keep going, but to start all over again is even harder!
So I try to stop working just before a good stopping point. At a pointwhere I know exactly what comes next, and it is easy to jump right in and do it without psyching myself up.
 2012 A Buffington") stop NOW This photo is what I left next to my sewing machine before I stopped for the day. I could have worked another 15 minutes and sewn those pieces together. I wanted to! I had played around with different possibilities and finally decided on what I thought would work. I was in the groove, still had enough energy and time to get to that good stopping point where that section was complete, and I could stick it up on my design wall.
But I stopped just BEFORE I got there! With un-attached pieces and a hole on the composition where that section belonged.
 2012 A Buffington")
What happens when I do this, is I am eager and ready to get started again RIGHT AWAY. Not next week or after I do the laundry. As soon as I can, I want to get back to work, because I know what to do and it is all ready to go. When I pull over to the shoulder of the busy highway instead of into a shady rest stop, I want to get right back on the road without getting comfortable at a good stopping point!
So I practiced this every day last week – stopping just before a good stopping point. And I was in my studio every day. I was very productive and energized. I finished 2 more pieces of what is going to be a fairly large triptych.
 2012 A Buffington")
 2012 A Buffington")
 2012 A Buffington")
But when I finished those 3 big pieces, I didn’t stop for the day. I started a new piece.
That was harder to do, I really wanted to have a glass of wine and celebrate. I was at an excellent stopping point. But I kept driving. Kept working. Pushed on for another hour or so. Successfully started a new project.
Which I stopped working on before I had all those pieces sewn together . . .
I can’t wait to get back into my studio!
 2012 A Buffington")
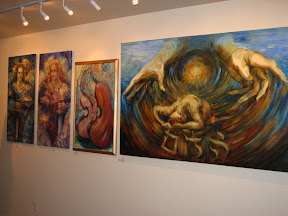
I had several pieces at Bezalel Gallery in Scottsdale.
The theme of the exhibit was “Spiritual Art”.
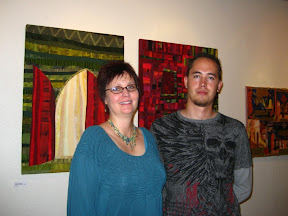
Here I am with my older son, Evan, at the gallery. Two of my large, new pieces are behind us.
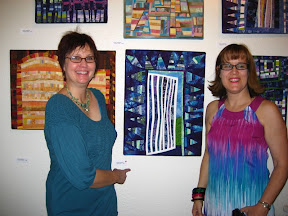 I sold a piece!
This is Elizabeth Sinclair and her new Art Quilt, “ Open Door”
Notice the RED DOT on the label!
I was really thrilled to have my art in a galley on Marshall Way! My friend and painting teacher, Elena Eros, has opened her own gallery. Bezalel Art Gallery She invited me, along with two other artists to show our work.
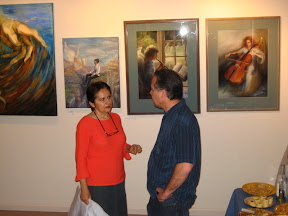
I missed the opening reception of the show, because we were in Spain. So I had my own reception during Thursday night ArtWalk. Friends and family showed up to see the art and enjoy wine and cheese. I had a great time and am grateful for the experience!
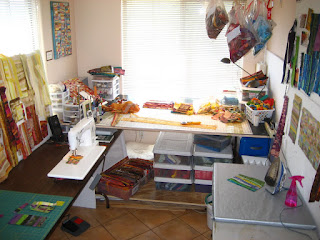 My studio is a little less than 8 feet wide, set up so I can move between sewing, cutting, pressing and designing stations by simply rolling and rotating in my chair. I have felt-covered Styrofoam boards nailed to the walls, and a couple of free-standing design boards. Fabric pieces easily cling to the felt surface and I can stick a pin through the Styrofoam if needed. These design walls are usually covered with works-in-progress, and sections of strip pieced fabrics from which I construct my art quilts. My studio is a little less than 8 feet wide, set up so I can move between sewing, cutting, pressing and designing stations by simply rolling and rotating in my chair. I have felt-covered Styrofoam boards nailed to the walls, and a couple of free-standing design boards. Fabric pieces easily cling to the felt surface and I can stick a pin through the Styrofoam if needed. These design walls are usually covered with works-in-progress, and sections of strip pieced fabrics from which I construct my art quilts.

I sort and store my fabric in clear plastic boxes – the size made to fit under a bed. Every piece of fabric, whatever the length or width, is wrapped around a 6″ acrylic ruler – and then I slip the ruler out so I have a flat roll of fabric. I stack the fabric on end in the boxes, so I can see the skinny edge of every piece in the box. Each box contains a color collection of fabrics – mixing prints, solid and hand-dyed fabrics, in pieces ranging from a few inches wide to a yard or two.

I cut strips of fabric using a rotary cutter, but no ruler, As I cut, I toss the strips in piles like fabric fettuccini. I will cut a variety of widths, in a range of values, hues and visual textures. The greater the number of different fabrics, the better they seem to work together. I organize these loose strips in large plastic baggies – hanging from a clothesline that stretches across the room above my head.
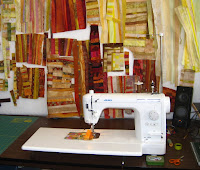 My sewing machine is a Juki TL 98Q with a quarter inch presser foot, knee lift and foot-operated thread cutter, which allows me to sew at breakneck speed. I also have a lot of control at slow speeds, and can set the needle to stay in the down position every time I stop. It only does a straight stitch, but it does it perfectly, and very fast. It is also fabulous for free-motion machine quilting. My sewing machine is a Juki TL 98Q with a quarter inch presser foot, knee lift and foot-operated thread cutter, which allows me to sew at breakneck speed. I also have a lot of control at slow speeds, and can set the needle to stay in the down position every time I stop. It only does a straight stitch, but it does it perfectly, and very fast. It is also fabulous for free-motion machine quilting.
 Another essential tool is my steam iron: I press each seam as soon as they are sewn – usually pressing seam allowances open to reduce bulky intersections. I press at each step of the cutting-sewing process, so a piece will be perfectly flat when finished. I made a large, rectangular ironing surface. from an aluminum shelf covered with a cotton towel and silver ironing board fabric. Another essential tool is my steam iron: I press each seam as soon as they are sewn – usually pressing seam allowances open to reduce bulky intersections. I press at each step of the cutting-sewing process, so a piece will be perfectly flat when finished. I made a large, rectangular ironing surface. from an aluminum shelf covered with a cotton towel and silver ironing board fabric.
My studio is one of my favorite places to be. I have good light and lots of design walls, and everything is organized so I can find exactly what I want without hunting. I love being able to sew, press, cut and design without getting out of my one rolling chair!
. . . but I don’t LIKE neutral gray backgrounds!
I am working with a professional website designer to create AdrieneBuffington.com , which will be my professional artist website. I may drive her bonkers, because I want it to look like a work of MY art, without detracting from my actual art.
So at the moment, I am scanning images of my hand-dyed fabric. Why? Because it has that crunchy texture I like better than a flat solid, and because it has a smidgen of color. the scanner is picking up the weave of the fabric too, which is strange. I may shoot photos of backgroundy fabrics too.
Once the whole thing is done, I will have a re-designed blog too. which I will actually USE to blog more than twice a year.
My artwork is at The Vision Gallery in downtown Chandler!
This gallery is fabulous – it is owned and operated by the city of Chandler (the Chandler Cultural Foundation). I feel really happy to have my work in this space.
Brave the road construction on Arizona Avenue, south of Chandler Blvd and stop in – the address is 80 South San Marcos Place (and yep, it’s just south of the San Marcos hotel). In October, the gallery will move to the new city hall building, and the current artwork will probably stay up until then.
I was talking to the curator/director today when I dropped off my pieces, and Eric said I should definitely raise my prices- so I did! But I still want to SELL some – so I didn’t make them too high.
Chandler Artwalk is now the Third Friday evening of each month – I will be in the Vision gallery for a while this Friday if you want to come down and say hello. Its not a formal opening, but it’ll be cool.
sneak preview of what I have in the gallery:
|

Adriene Buffington
|

2012 A Buffington")
 2012 Buffington")
 2012 A Buffingotn")
2012 copy")
 2012 A Buffington")
 2012 A Buffington")
 2012 A Buffington")
 2012 A Buffington")
 2012 A Buffington")
 2012 A Buffington")
 2012 A Buffington")


